


Dickson Support Database
DicksonOne SSO Set Up ADFS
 #
#

Requirements #
- All users must have a first name, surname and email address as attributes within an Active Directory instance
- Must have a subscription plan with SSO enabled
- AD FS supports SAML 2.0 and on
- SSL certificate for AD FS login and fingerprint for the certificate
Instructions #
Phase 1: Add a Relying Party Trust #
- In the AD FS Management console, select Relying Party Trusts, and then right-click to select Add Relying Party Trust…

and then click Start

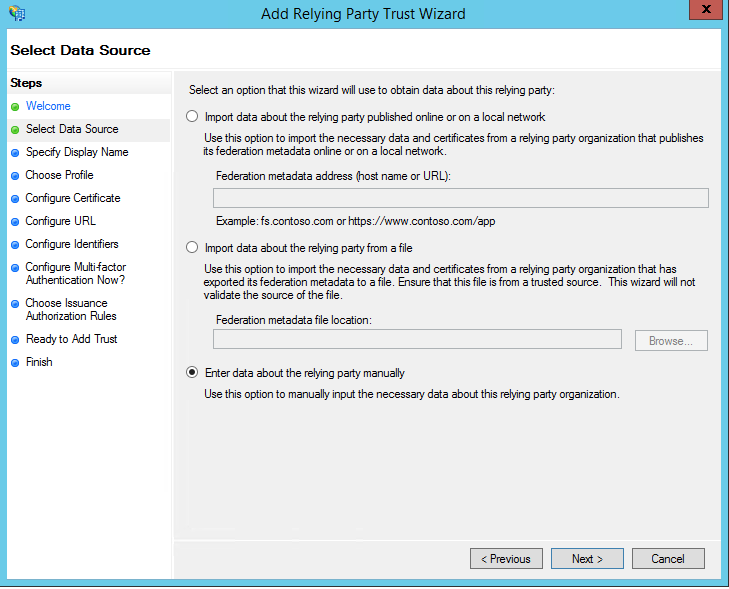
- In Select Data Source, select the last option Enter data about the relying party manually and then click Next >
- An XML file is provided on DicksoneOne.com if Importing the Data is prefered
- Please see Phase 4 for more info
- On the next screen Specify Display Name, enter a name you will recognize in Display name: and click Next >

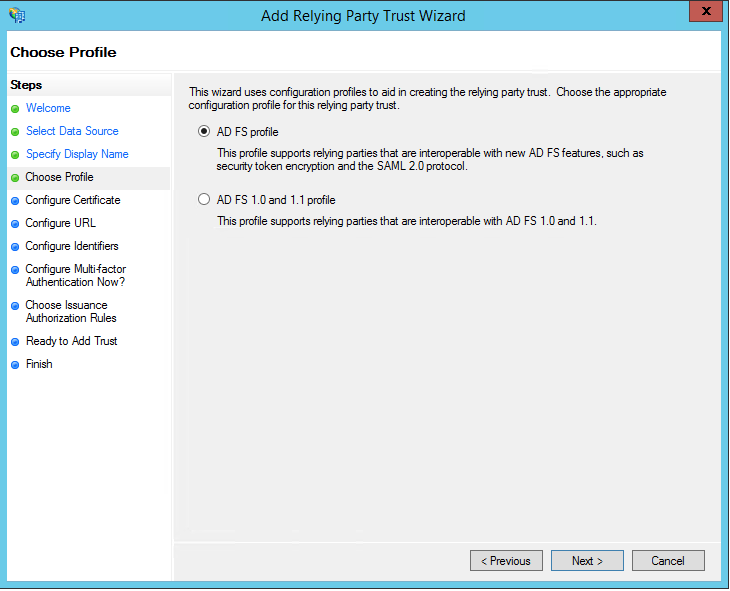
- In Choose Profile, you will select AD FS profile which supports security token encryption and the SAML 2.0 protocol and then click Next >
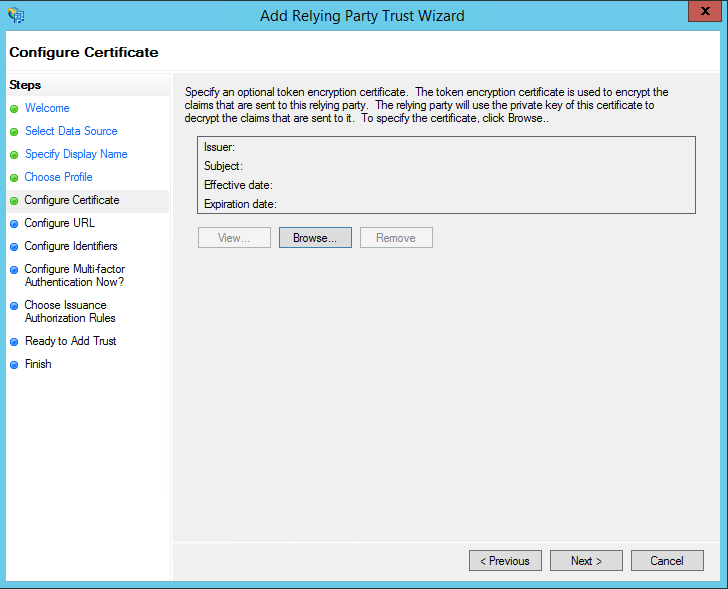
- In Configure Certificate leave the default values as is and click Next >
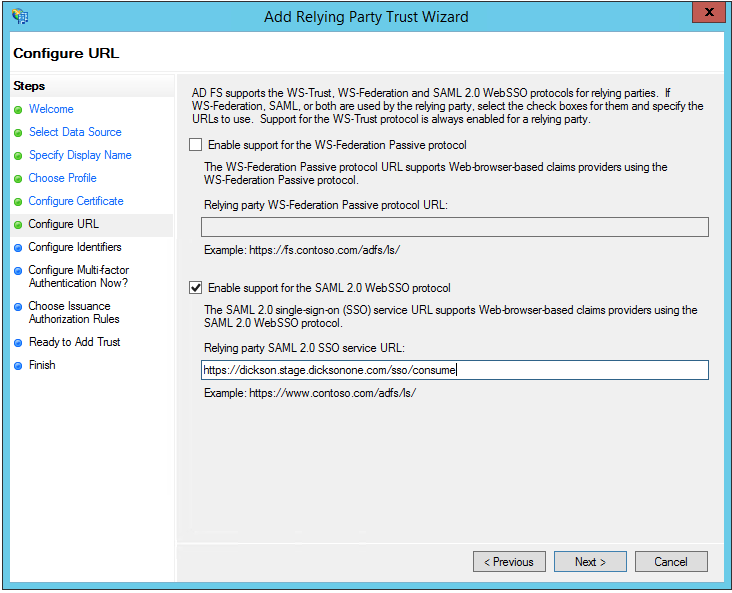
- In Configure URL, check the box Enable support for the SAML 2.0 WebSSO protocol and fill in the Relying party SAML 2.0 SSO service URL: with your Consumer Service URL found on your DicksonOne account (see more in Phase 4)
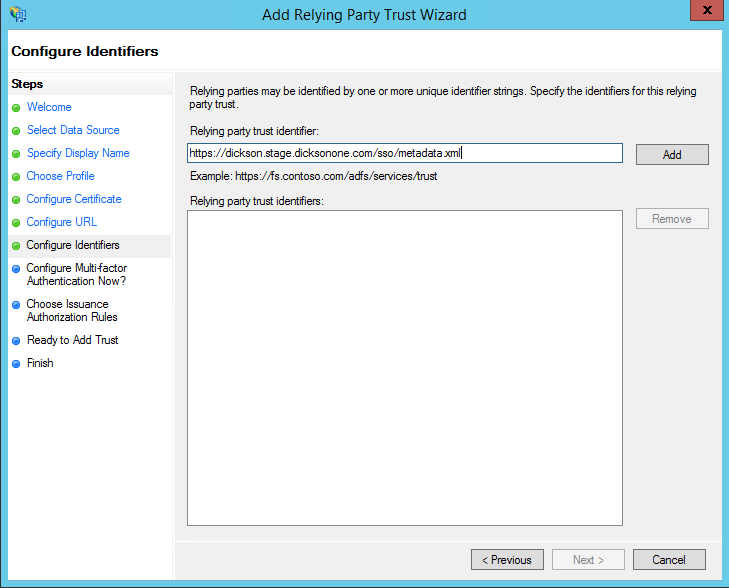
- Configure Identifiers by placing your URL under Relying party trust identifier:, click Add and click Next >
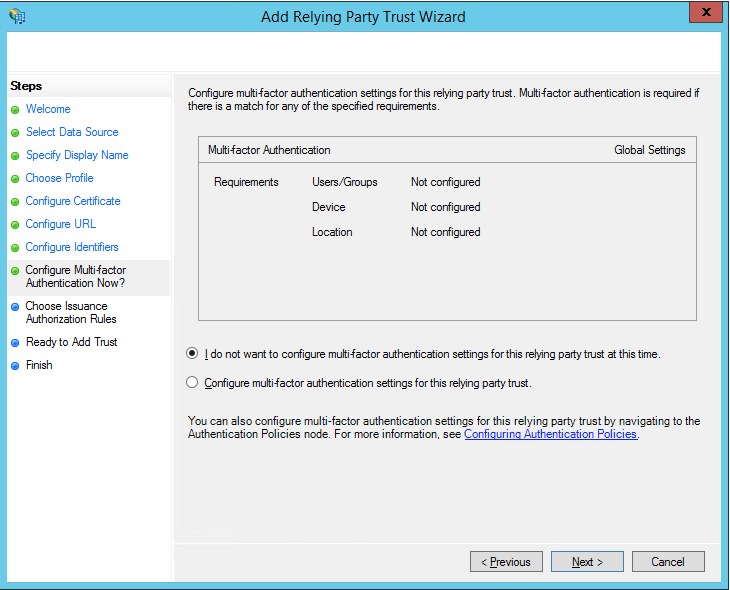
- In Configure Multi-factor Authentication Now select I do not want to configure multi-factor authentication settings for this relying party trust at this time and click Next
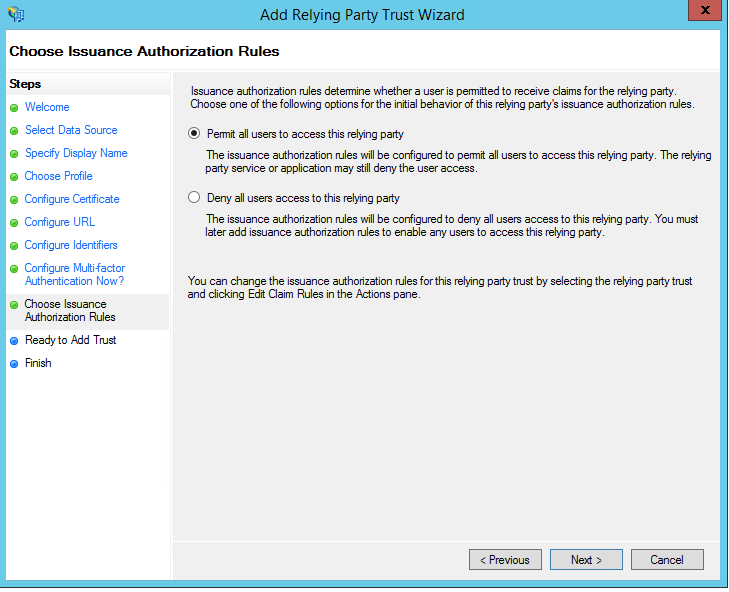
- For Choose Issuance Authorization Rules click Permit all users to access this relying party and then click Next >
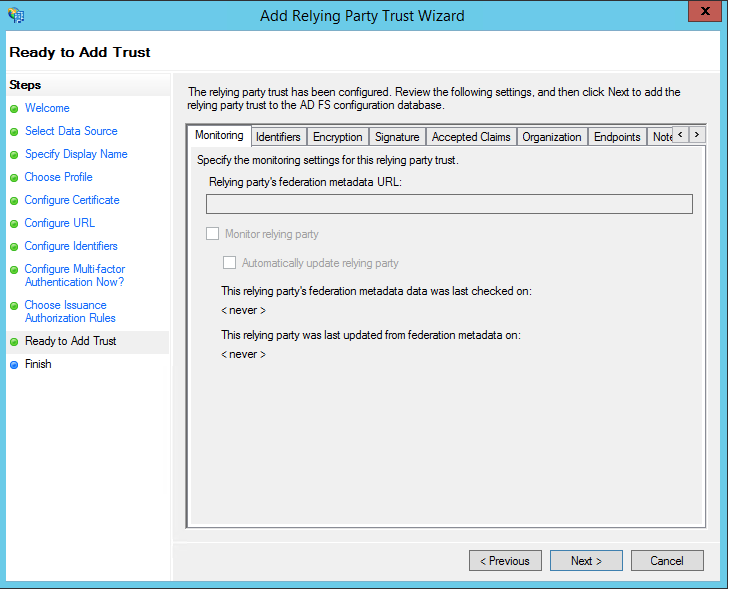
- In Ready to Add Trust, click Next >
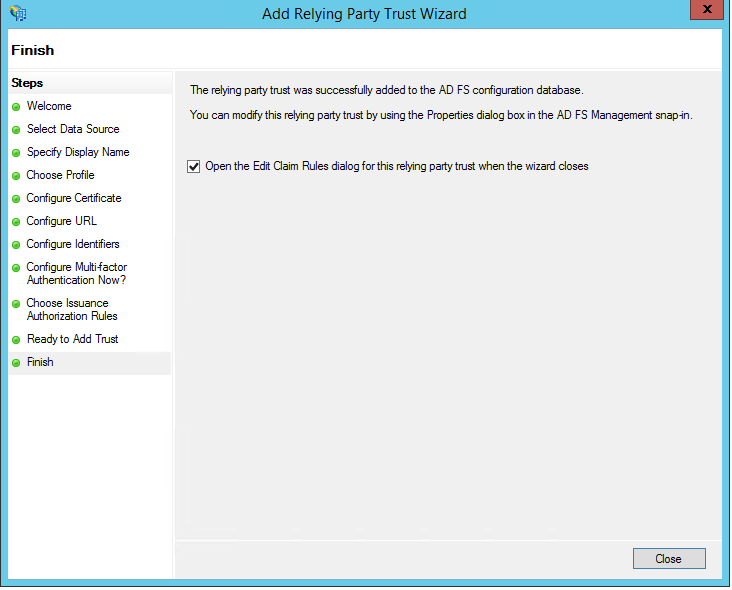
- On the final Finish screen, check the box Open the Edit Claim Rules dialog for this relying party trust when the wizard closes, and click Close
Phase 2: Create Claims Rules #
The claim rule editor will automatically open once you have created the trust
- Create rule in Issuance Transform Rules by clicking Add Rule…
- In Choose Rule Type you will select Send LDAP Attributes as Claims from the drop-down under Claim rule Template:

- On the next screen Create a name in Claim rule name:, under Attribute store: select Active Directory from the drop-down, under Mapping of LDAP attributes to outgoing claim types: select E-Mail-Addresses. Given-Name, Surname for both columns

- On the next screen click Apply and then OK

Phase 3: Adjust Trust Settings #
Settings in your relying party trust may need adjustment
- Open your newly added DicksonOne Relying Party Trust by double-clicking
- In the Properties window, click on Advance, and the Secure hash algorithm: should be set to SHA-1


- Click on Endpoints and click add SAML as the new endpoint


- Endpoint type: set to SAML Logout
- Binding: set to POST
- Trusted URL: Add the following string /adfs/ls/?wa=wsignout1.0 to your AD FS FQDN to like this


https://(Your ADFS FQDN)/adfs/ls/?wa=wsignout1.0
- Response URL: should be left blank
- Click OK

- Click Apply and then OK

Phase 4: Get Started with SSO Configuration on DicksonOne #
Go to DicksonOne > Manage > Account > SSO Config

- DicksonOne SSO URL: Provided by Dickson
- Issuer Metadata URL: System generated
- Users’ Metadata XML URL
- Part of Phase 1 step 7.
- Can be downloaded for use
- Consumer Service URL: System generated
- User for Error Handling
- Part of Phase 1 step 6.
- IDP Sign-On URL: User Provided
- IDP Logout URL: User Provided
- Should have been created in Phase 3 step 3 b.
- SHA1 Certificate Fingerprint: User Provided
- Fingerprint must be from the Token Signing Certificate
- Force users to sign in through SSO? Allows the account owner to control if users should have to sing in with their AD credentials or if it is not forced users will be able to login with their DicksonOne email and password
Help and Support #
- Learn more on how SAML supports integration with Active Directory Federation Services
- Contact Information
- Email: su*****@********ne.com
- Phone: 1-800-757-3747
Frequently Asked Questions
What happens with user logins when SSO is forced?
- Users will have to login using their Active Directory (AD) credentials
- If the user has an email and password in DicksonOne, the user will not be able to login in and will see a message displayed Password-based login has been disabled for your account. Please sign in using your Single Sign-On identity provider.
- The user will have to click on Single Sign-On to be rerouted to their company’s DicksonOne SSO login page
What happens with security when SSO is forced?
- Security settings will be managed by your company’s group policy
- User Time out in account settings will be the only security option available
Notes
- The screenshot in Phase 4 will get updated so that it includes the ‘Force SSO’ toggle as well as a second screenshot to include ‘Security Settings
- The subdomain appears in all lowercase letters on DicksonOne, and should be the same when entering it in Phase 1, Steps 6 and 7 if configuring the set up trusts manually
- To force users to log out, you will have to use the ‘User Timeout’ found in ‘Security Settings’
Go to Account > Manage > Account > Security Settings > User Timeout
- When signed in via SSO, the logout on DicksonOne does not cancel the token and users will still be able to
- Timeout Parameters:
- WebSSOLifetime – Server wide timeout parameter – Default value = 480 mins(8hrs)
- TokenLifetime – This is configured for each Relying party – Default value = 10 hours
- When a user click logout, it should cancel the token, and take you back to the main company landing page.
Questions?